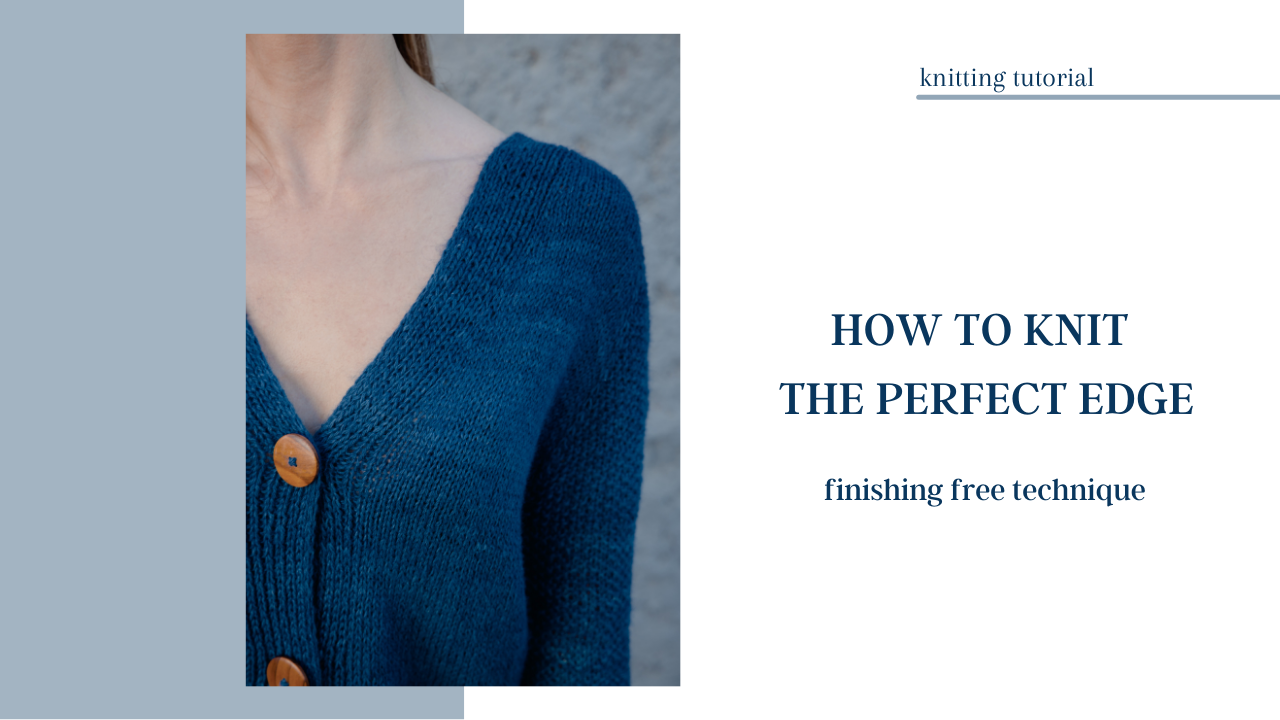
How to Knit a Perfect Edge - Finishing Free Technique

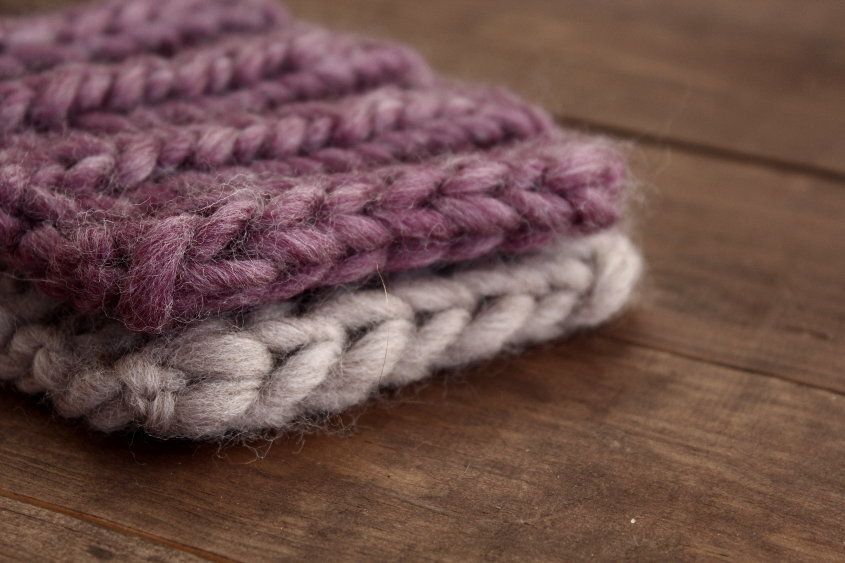
Today I would love to share with you a technique that I learned several years ago that is absolutely essential for cardigans if you want to avoid knitting the bands and finishing the raw edges. It also comes in handy for scarves or any items with open raw edges. It looks like an applied I-cord, but rather than picking up stitches along the edge and knitting the i-cord on, you knit "I-cord" simultaneously with the main fabric and don't have to spend time to trim the edges after you are done with the project - a huge time saver!This technique can be used with any stitch pattern. It looks best when knit next to the textured stitches, but can be used with simple stockinette, it won't "pop" as much, but it will do the work - keep the edge of your knitting flat and neat - from the front, back and the sides. I used it a lot in my "pre-blog era", but there are several projects with this technique documented here - Textured Scarf (I think it was my third or forth blog post!), Journey sweater (to create side splits). There are two types of "i-cords" or selvage stitches I use - double and triple. They look slightly different from each other. Triple is thicker and will be perfect for cardigan front edges - it will perfectly hold the shape. Double is great for light garments and for lace. First I will give you the written instructions and then I'll break it down for you in step-by-step photo tutorial.
UPDATE. May 2021. The video version of this tutorial is live on my YouTube channel.
Abbreviations
Sl - slip.
wyib - with yarn in back.
wyif - with yarn in front.
st/sts - stitch/stitches.
k - knit.
p - purl.
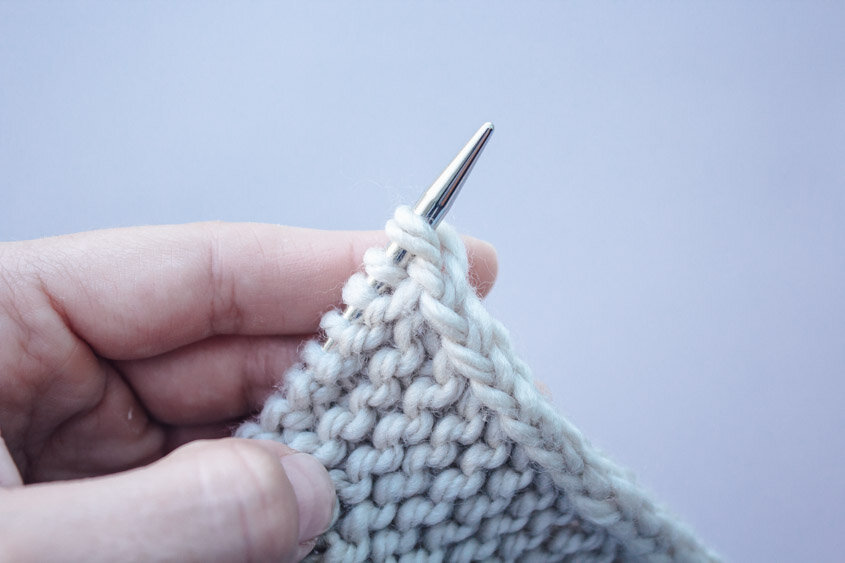
Double Selvage
Instructions:
Row 1 (RS): Sl 1 wyib, k1; work in any given stitch pattern to last 2 sts; sl 1 wyib, p1.
Row 2 (WS): Sl 1 wyib, p1; work in any given stitch pattern to last 2 sts; sl 1 wyif, p1.
Repeat Rows [1-2] for a double i-cord/selvage.
Tutorial
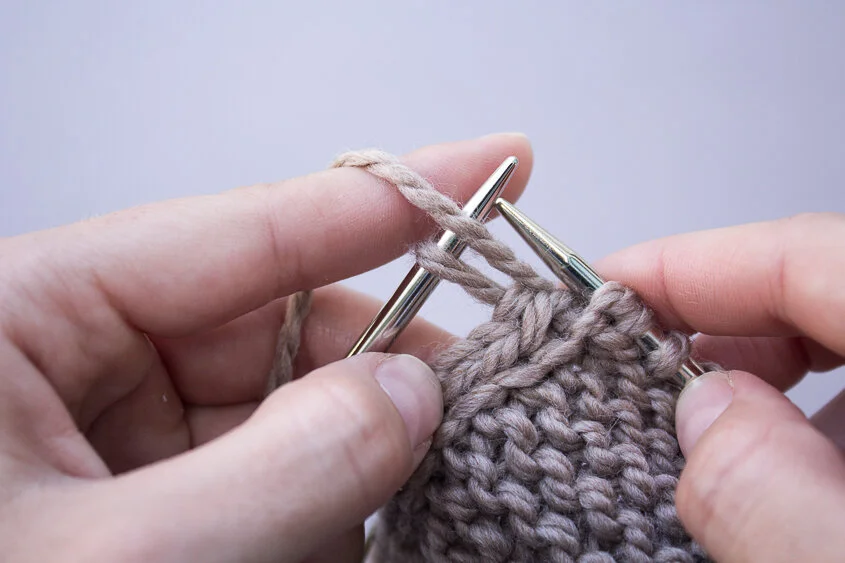
Click on the image to enlarge it.
Right Side Row


Wrong Side Row


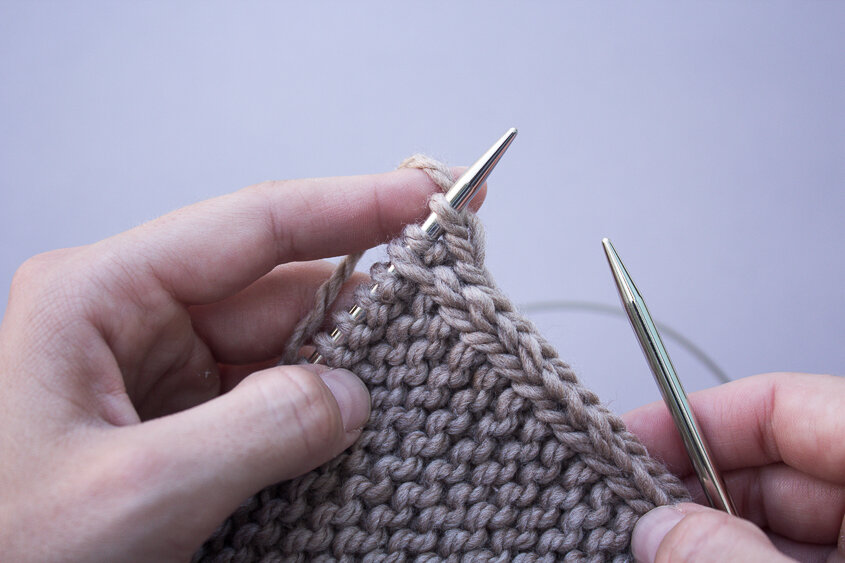
Triple Selvage
Instructions:
Row 1 (RS): Sl 1 wyib, sl 1 wyif, k1; work in any given stitch pattern to last 3 sts; k1, sl 1 wyif, p1.
Row 2 (WS): Sl 1 wyib, k1, sl 1 wyif; work in any given stitch pattern to last 3 sts; sl 1 wyif, k1, p1.
Repeat Rows [1-2] for a triple selvage/i-cord.
Tutorial
Click on the image to enlarge it.
Right Side Row


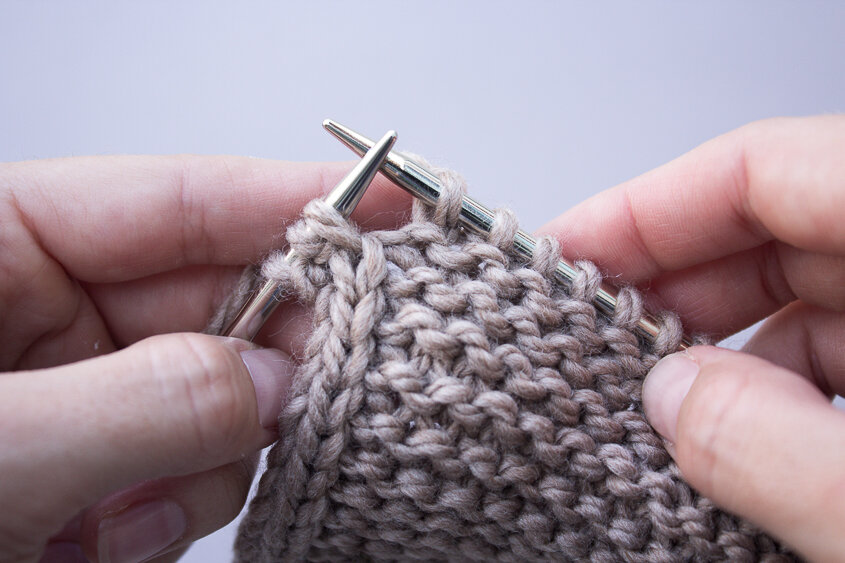


Wrong Side Row


The result
The front of the work:
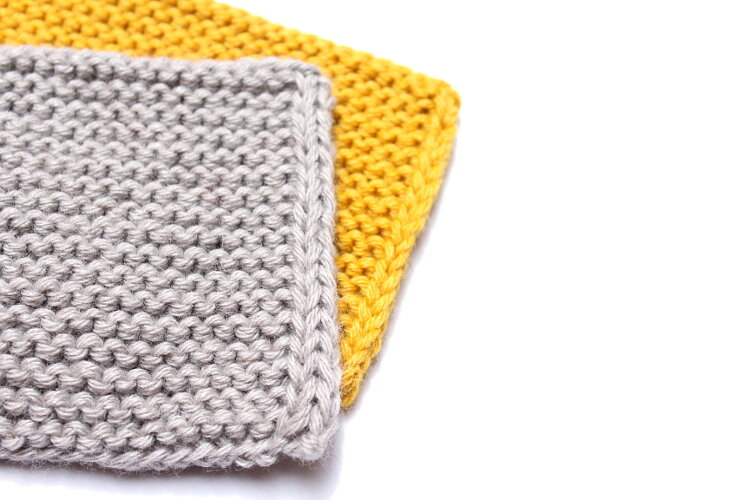
The back of the work:

As you can see both sides are equally neat and even. One more thing to remember - if you are adding this edging to a scarf, for example, don't forget to add 4 (for a double one) or 6 (for a triple one) extra stitches to your stitch count.
I hope you will find this tutorial useful for many of your future projects!
UPDATE
I gathered most commonly asked question in the comments and in the emails and tried to answer them in the best way possible - I created an additional blog post for it (How To Knit The Perfect Edge. Ribbing and Binding Off). I am copying my answers here, so you can have everything in one place.
What stitch pattern can I use the i-cord edge with?
Basically, you can use it with ANY stitch pattern. But I would say that the i-cord looks the best next to the textured stitch patterns.When used next to the stockinette stitch, there are some things to keep in mind.
The icord won't stand out as much against the stockinette as it does against the textured stitches.
If knit too tight, it might start pulling the stockinette fabric. Make sure to swatch before you use it on a bigger project. If you see that the i-cord is puling the fabric, you will have to watch your tension more carefully and make i-cord stitches longer than the ones in the main fabric.
The edge will stop the rolling of the fabric, but you might have to adjust the number of stitches in the i-cord. Thinner yarns will require more stitches to keep the edge in place, with thicker yarns 3-st i-cord selvage might be enough. The only thing to know for sure what works best for you is to make a swatch.
The i-cord would look and behave perfectly with garter stitch, brioche stitch or any slip stitch textured pattern.
How many extra stitches to add to the stitch count?
Though I mentioned it in the main tutorial post, I still got some questions, so I decided to cover this question in a more detailed way.For 2-st I-cord selvage you will add 4 extra stitches to your stitch count. For 3-st I-cord selvage you will add 6 extra stitches to you stitch count.So, if you have the pattern, let's say, for the garter stitch scarf that tells you to cast on 60 sts and you want to add the 2-st i-cord selvage to it, you will cast on 64 sts and if you are adding 3-st i-cord selavage, you will cast on 66 sts.
How to add the i-cord selvage to the cardigan bands?
This question cannot be covered in one post. If you are an experienced knitter and can easily modify patterns, here are some tips that can help you:
You can use the i-cord selvage only when the bands are knit simultaneously with the body or if the bands are knit separately and then sewn on the body of the cardigan.
If the stitches for the pattern are being picked up and the band is knit perpendicular to the main body of the cardigan, then you should use the i-cord bind off technique.
If you are more confident with following the pattern, The Choice and Fog are the knits where the i-cord selvage technique is used - when the band is knit simultaneously with the body of the cardigan.
Do you slip stitches knitwise or purlwise?
The stitches are supposed to be slipped always purlwise.
How to use the i-cord edge when changing colors?
This question cannot be covered in a couple of sentences, I will make sure to create a separate tutorial for it!
How to use the i-cord edge with the ribbing?
The i-cord edge is perfect for using with ribbing patterns! As a matter of fact, I have used it in all my patterns with the split ribbing edge. You can find it in different variations in my patterns. You can check the tutorial for the selvage i-cord + ribbing here - How To Knit The Perfect Edge. Ribbing and Binding Off
How to bind off the i-cord edge?
Binding off the i-cord is not much different as binding off in pattern any other stitch. For a photo tutorial see this post - How To Knit The Perfect Edge. Ribbing and Binding Off